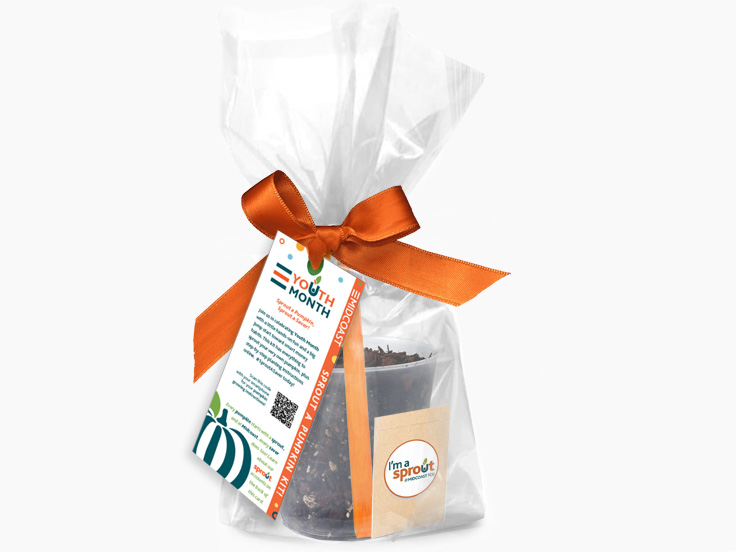
Sprout a Pumpkin!
Midcoast is where savings…and pumpkins, begin! Join us in celebrating Youth Month with a little hands-on fun as young growers learn how something small can turn into something amazing.
Follow our simple, step-by-step seed planting instructions and sprout a pumpkin of your very own, because great things grow when you start early!
Pumpkins get planted in the Spring?
Pumpkins take a long time to grow. In fact, it is about 100 days! In Maine, the weather can change quickly, so planting in the spring helps us make the most of the growing season before chilly fall temperatures arrive. Starting seeds indoors lets them build strong roots in a nice warm and protected environment. When they are strong enough to survive outside, we will plant them in the garden where they will continue to grow all through the summer and into fall.
What kind of pumpkin are we growing?
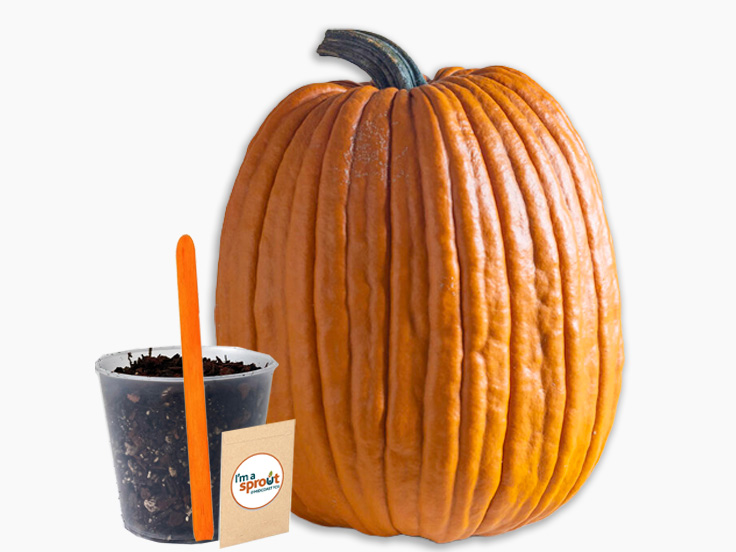
The pumpkin seeds in your packet are Igor pumpkins, pronounced “Eye-Gor.” If we take really good care of them, they can grow to be BIG, and up to 25lbs! We purchased the seeds directly from a wonderful company named “Johnny’s Seeds” out of Winslow Maine. (www.johnnyseeds.com)
What kind of soil is included? *Soil contains shellfish meal
We chose to use “Sprout Island Blend” seed starter soil. It is specially designed for providing seeds with their essential nutrition and actually is made right here in Maine! It is by “Coast of Maine Soils” out of Marion Maine. (www.coastofmaine.com) *Safety Note: Coast of Maine’s website lists that a shellfish meal (lobster & crab) is used in their soil and at their facility. Please use caution if you or your child has a shellfish allergy. visit their website for additional allergen information.
When to get started?
Pumpkin seeds will grow quickly and if we start them too early, they may outgrow the cup before it is warm enough to plant them outside.
Maine’s last frost of the season often comes in April. As a rule of thumb, Maine gardeners try not to put delicate seedling plants out prior to Memorial Day, May 25th, so this means…
For the best results, we should start our seeds indoors in the first or second week of May. May 1st – May 15th. That will set us up to have happy healthy seedlings ready for outdoor planting on or about May 25th.
What can you do today?
- Decorate your seed cup! With the lid on, you can use markers to draw on the cup or even add stickers!
- Decorate and write your name on the popsicle stick!
- Find the perfect window spot. Seedlings like to be WARM (65 degrees or warmer.) They also like a lot of sunlight! If a window isn’t an option, you can also use a heat mat and artificial lights.
- Gather watering supplies: a small spray bottle works great! Seeds love to be misted with water. This is a great way to allow kids to help with the watering and helps to make sure they don’t overwater. Small spray bottles can be found the local dollar store.
- Read a book about pumpkin planting! A great book by a wonderful Maine author, is “Pumpkin Pumpkin“ by Jeanne Titherington. It is a cute story about a child that plants a pumpkin seed in the spring and, after watching it grow all summer, turns it into a jack-o-lantern for Halloween! But best of all, he saves some seeds that he will plant again next spring. It is beautifully illustrated and perfect for young readers.
Safety Note: Always supervise children when using seeds, as they can be a choking hazard.
May 1st – 15th Start your seeds!
(We recommend saving the 2nd seed just in case your first seed start was unsuccessful…low light/overwatering etc. This way, you can try again!)
- Step 1: Pre-Soak the Seed (up to 8 hours) This step is optional.
- The outer shell of a pumpkin seed is very hard and soaking them in a paper towel can help to soften them, making it easier for the embryo to break through the shell.
- Place a paper towel on a dinner plate and add your pumpkin seed on top.
- Cover the seed gently and mist/spray with water until the towel is fully saturated. Repeat the spray as needed for up to 8 hours.
- Step 2: Prepare the Cup
- Make 2–3 small holes in the bottom of the plastic cup for drainage (an adult should help).
- The cup should be filled with soil, leaving about 1 inch of space at the top.
- Lightly press the soil so it’s firm but not packed hard.
- Step 3: Plant the Seed
- Poke a hole in the soil about 1 inch deep (about the size of your fingertip).
- Place 1 pumpkin seed in the hole with the pointed end facing down if possible (don’t worry if you’re unsure).
(Again, we recommend saving the 2nd seed just in case your first seed start was unsuccessful…low light/overwatering etc. You can try again!) - Cover the seed gently with soil. Do not pack it in.
- Water/spray until the soil is moist but not soggy.
- Step 4: Give It Warmth and Light
- Place the cup in a sunny window where it gets at least 6–8 hours of sunlight daily.
- Pumpkins love warmth – (68°F) or room temperature is perfect.
- Keep the soil slightly moist. Check daily with your finger and mist with the spray bottle.
- Step 5: Watch It Grow!
- Seeds usually sprout in 5-10 days.
- First you’ll see two small leaves (called seed leaves), then bigger pumpkin leaves.
- Turn the cup every few days so the plant grows straight toward the light.
May 25th – June 5th Plant outside!
We can plant outside when the frost danger has passed and night temperatures stay above 50°F. For colder areas of Maine, it may be wise to wait until May 30 – June 10. A great local resource to help you properly gauge the perfect planting time in your area is to look up your town in the zone charts provided by MOFGA (Maine Organic Farmer’s Association) www.mofga.org, or on the “University of Maine’s Cooperative Extension” website: https://extension.umaine.edu/gardening/ Both offer really great Maine gardening tutorials and reference material.
- Step 1: Choose the Right Spot
- Full sun (at least 6–8 hours daily)
- Lots of space — pumpkin vines spread 6–10 feet
- Soil that drains well
- Step 2: Prepare the Ground
- Dig a hole about 12 inches wide and 12 inches deep.
- Mix in compost or garden soil if available.
- Create a small mound (pumpkins like raised soil).
- Step 3: Transplant the Seedling
- Water the cup before planting (this helps roots slide out).
- Gently squeeze the cup and remove the plant with soil intact.
- Place it in the hole at the same depth it was growing in the cup.
- Fill soil around it and press lightly.
- Step 4: Water and Protect
- Water deeply right after planting.
- Continue watering 2–3 times per week (more during hot weather).
- If nights are still chilly, cover with: A plastic jug with the bottom cut off, or garden fabric (adult help recommended).
Extra Tips for Giant Igor Pumpkins!
- Keep watering consistently and do not let the soil dry out.
- Feed with vegetable fertilizer every 2–3 weeks once established.
- Keep weeds away so the pumpkin gets all the nutrients.
- In July, look for BIG yellow flowers to appear! This will attract the bees and bees will help make pumpkins grow!
- In August, when the pumpkins start to get big, you can place cardboard or straw under them to help keep them clean.
- In September, check the vines for damage and take measures to keep furry critters from snacking on your pumpkin.
- In October, reduce watering slightly and harvest before the first frost.
August: Fun Idea- Pumpkin Tattoo!
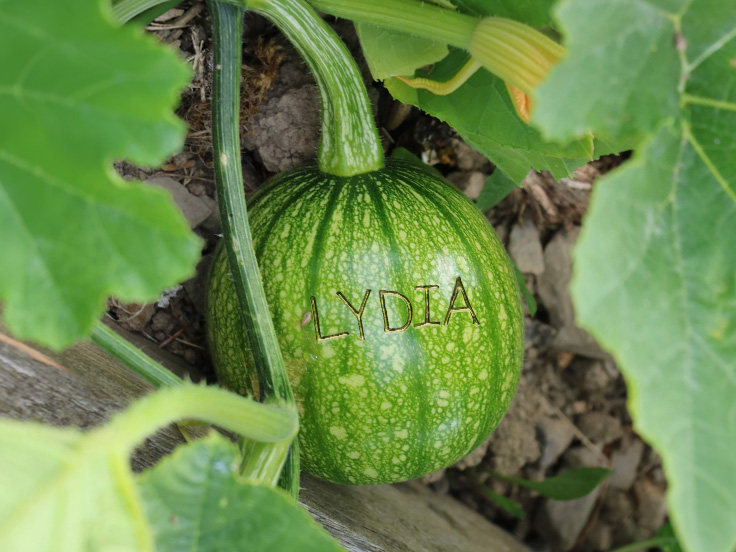
In August, while it’s still green and growing, try “tattooing” your name on your pumpkin!
- Pick a young green pumpkin. (If you try to do this later, the rind will be too rigid for a clear mark.)
- Use an old ballpoint pen (or other blunt-tipped tool.)
- Gently press your name into the pumpkin’s skin. Press firmly enough to leave a mark, but don’t puncture or cut the skin.
- Continue caring for your pumpkin with water and sunshine.
As the pumpkin grows, the mark will stretch along with it and will become a permanent “tattoo” or color change. Your name should still be visible through harvest time!
Why it works: The pumpkin’s skin hardens as it grows, preserving the shallow impression and creating a one-of-a-kind personalized or “tattooed” pumpkin.
Other Fun Ideas
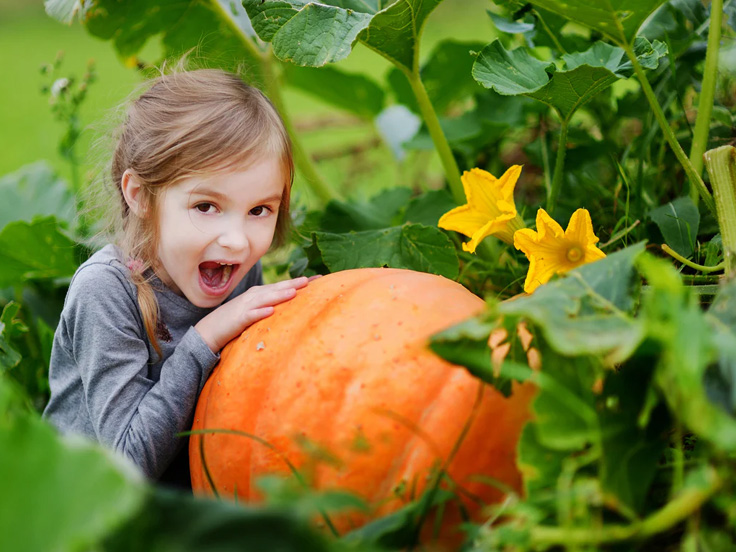
- Name your pumpkin
- Have a family pumpkin growing contest
- Decorate your pumpkin patch
- Read stories to your pumpkin! (“The Itsy Bitsy Pumpkin” is their favorite!)
- Send photos back to us at Midcoast! We’d love to see your sprouts and share in their success!
October: Harvest Your Igor Pumpkin!
- How do you know when it’s ready? Look for these signs!
- The pumpkin has turned a deep orange color.
- The outer skin feels hard and cannot be easily scratched with your fingernail.
- The vine may begin to dry out and turn brown.
- The pumpkin sounds slightly hollow when tapped.
- How to Harvest
- Ask an adult to help with cutting, and use garden scissors or pruners to cut the stem 3-4 inches above the pumpkin.
- Never carry a pumpkin by its stem! The stem can break off! Gently lift your pumpkin from the ground and brush away any dirt.
- If you are not ready to carve your pumpkin right away, keep it in a cool, dry place out of direct sunlight to help it stay fresh longer.
Create a Spooktacular Jack-o’-Lantern!
- Step 1: Clean the seeds out – Have an adult help!
- Before you get the kids started, gather all of your tools and clean the equipment! Here’s a list of all the things you’ll need:
- Newspaper (or a throw away tablecloth works too!
- Marker (Dry erase works great!)
- Paper towel (to wipe off the marker)
- Pumpkin carving kit or carving tools
- Large bowl (for all the guts! …and seeds)
- Instead of cutting a hole in the top, cut an opening in the bottom of the pumpkin! It’s the easiest way to clean out a pumpkin! Plus, it helps the pumpkin keep its stem, helps prevent the top from caving in, and makes it super easy to add or remove the light source.
- Scoop out all of the stringy pulp into a bag. Take care to set aside all the seeds!
- Before you get the kids started, gather all of your tools and clean the equipment! Here’s a list of all the things you’ll need:
- Step 2: Design Your Face – Is your pumpkin happy? Scary? or Silly? You get to decide!
- If carving isn’t ideal, you can do “no‑carve decorating” and use paint, stickers, or markers.
- Have an adult help with carving tools and sharp knives.
- Draw your design with a washable marker first. (Simple shapes are often the easiest for younger pumpkin artists.
- There are several kits available that offer templates that can be taped onto the pumpkin and scored to provide you with exact cutting lines.
- Pro Tip: You can use metal cookie cutters to cut extra details into your pumpkins like bats!
- Pro Tip: If you break off pieces of the pumpkin while carving, you can put them back with toothpicks!
- Step 3: Add some light!
- Rather than using a candle, we recommend using a Use a flameless battery-operated tea light for safety.
- Pro Tip: Use a remote operated flameless Led candle and turn the pumpkin on or off with the push of a button from inside the house!
- Step 4: Make it last through Halloween – A carved pumpkin typically will last about 2 weeks. With a little care, your jack-o’-lantern can stay looking great all the way through Halloween!
- Place it on a dry surface such as a board, tray, brick, or porch step. Avoid placing it directly on the ground, where moisture can cause it to rot more quickly.
- Remove any standing water that collects inside.
- Pro Tip: To extend the life or your pumpkins, coat a thin layer of petroleum jelly on the edges and outside of the pumpkin. This will slow the decaying process.
Save or Snack? What to do with Pumpkin Seeds
Did You Know? A single pumpkin can produce hundreds of seeds. That’s plenty to enjoy as a snack and save a few for next year’s pumpkin-growing adventure, so don’t throw away those pumpkin seeds!
- Save Seeds for Next Year’s Garden
- Separate the seeds from the pumpkin pulp.
- Rinse them thoroughly with water.
- Spread them on a paper towel or baking sheet.
- Allow them to dry completely for 1-2 weeks.
- Store them in a labeled paper envelope in a cool, dry place until spring.
- Who knows? Next year’s pumpkin might be even bigger!
- Roast Pumpkin Seeds for a Tasty Treat – With an adult’s help.
- Wash and dry the seeds.
- Toss them with a little cooking oil and a pinch of salt.
- Spread them on a baking sheet.
- Roast at 300°F for 30-40 minutes, stirring occasionally.
- Allow them to cool before eating.
- Try adding cinnamon sugar, garlic powder, or your favorite seasoning for extra flavor!
We’d LOVE to see your pumpkins! Send photos back to us at Midcoast!

Not a member yet? You can join online!
It takes just about 10 minutes to apply! Open an account online anytime.